The modeling process is essential in additive manufacturing. This is especially true when creating complex parts. There are a variety of CAD software programs for 3D printers in the 3D print sector. A growing market requires that players reduce production times while saving material and maintaining part quality. How can 3D-printed parts be produced faster than before? Answer: Increase the number of pieces produced in one print run. Nesting software is used to optimize the process of 3D printing at this stage.
Nesting software plays a relatively simple role. This software allows for the maximum reduction in material costs and production time. The software does not permit you to design a 3D model, so it is not considered CAD software. The software’s main purpose is to optimize placement of the parts on the print bed so that the maximum number of parts can be printed in one run. 3D nesting, whether automated or manually, sorts, orientates and organizes 3D data to maximize the space within a 3D Printer, without interfering in non-manufacturing zones.
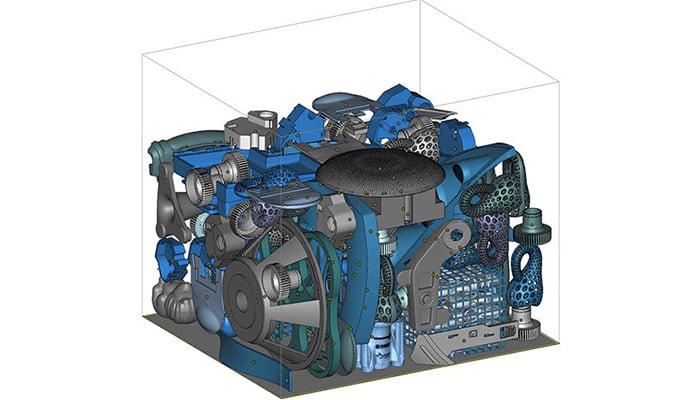
Photo credit: Materialise.
Inefficient nesting, however, can result in material waste and printing mistakes. Nesting software works in 3D Printing like Tetris. You place the blocks in specific areas to optimize the space available on the gameboard. As an added design option, it is increasingly being offered in CAD software. Some of the solutions available on the market include Sculpteo’s Fabpilot, CoreTechnologie’s 4D_Additive and Autodesk’s Fusion 360 and Inventor Nesting. Most nesting software is an extension to CAD.
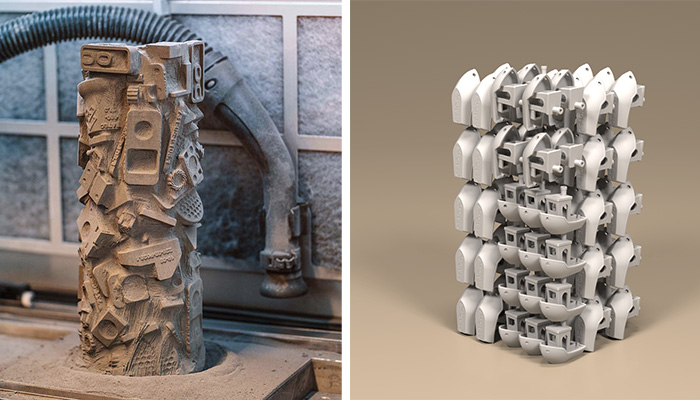
This method is compatible with most 3D printing techniques. It’s important to note, however, that 3D nesting is more advantageous for processes that use powder and don’t require support structures. So, 3D Printers that use PBF solutions such as DMLS or SLS will be more valuable. Sintratec is a manufacturer SLS 3D printing machines. They have confirmed the benefits of this software by using a 3D laser sintering machine. Sintratec reports that nesting was able to save 800 hours for part production, 47kg of powder and 50hours of labor in 100 printing jobs. This technique is designed to improve the productivity of 3D printing companies while saving money on materials. Binder jetting can also be used to nest. The powder bed fusion is preferred.
Powder-based technologies are most effective for nesting.
Nesting software can be used for all materials that are used in these 3D printing technologies. You can use the 3D-nesting method for metal, nylons, polypropylenes, or PEEK. Also, for technologies such as DLP or MSLA, nesting in 3D is possible. Nesting, however, does not save material, it only reduces the time required to create parts. Nesting in 3D-printing is compatible, logically, with all types 3D printers. The vast majority of this software is intended for industrial and professional machines due to the higher production volume. Nesting can be used for 3D printing in many industries, including automotive, aerospace and medical. In fact, 3D-printing technologies can be applied to all industries by nesting. Additionally, nested parts are not necessarily all the same, depending on the customer’s requirements. These parts may be different in size and shape.
The 3D printing nesting software mistakes to avoid
There are some details that you should pay attention to when using 3D nesting programs to avoid printing mistakes. First of all, in automated or manual nesting, it’s important to leave at least a 1.5 mm gap between all the components in your 3D file with SLS techniques, and a 5 mm gap with MJF processes. The heat from 3D printers can prevent parts from fusing together during the print process. Then there’s what we call interlocking rings. This problem arises when the software doesn’t respect the structure of two ring-shaped parts, and the elements cross or bind together. Two parts become useless. The third mistake is printing a tiny object inside the space of a large part. It makes it impossible for you to remove. In order to remove the two parts, a small gap must be provided by the user. Even if the nesting is done correctly, it must be kept simple to prevent curling. This 3D printing phenomenon occurs when the print layers don’t stick together properly, resulting in curved edges or misaligned layers.
What do you think about nesting? Let us know in a comment below or on our LinkedIn, Facebook, and Twitter pages! Don’t forget to sign up for our free weekly Newsletter here, the latest 3D printing news straight to your inbox! You can also find all our videos on our YouTube channel.
*Cover Photo Credits: Sintratec