REVIEW – I’ve been having fun with printing photographs from my Epson EcoTank Photograph ET-8500 Wi-fi Coloration All-in-One Supertank Printer. Printing photographs utilizing this printer is easy and enjoyable. Nevertheless, the utmost dimension photograph I can print is 8×10 and I’d like to have the ability to print bigger photographs. I just lately acquired the chance to evaluate the Epson EcoTank Photograph ET-8550 All-in-One Huge-format Supertank Printer. This photograph printer will print as much as 13″ x 19″ photographs. How properly does it work? Fantastically!
What’s it?
The Epson EcoTank Photograph ET-8550 All-in-One Huge-format Supertank Printer is an inkjet photograph printer for newbie photographers and hobbyists that can print bigger borderless photographs (as much as 13″ x 19″), in addition to extra widespread dimension photographs. It has auto two-sided printing and it scans and copies.
What’s within the field?
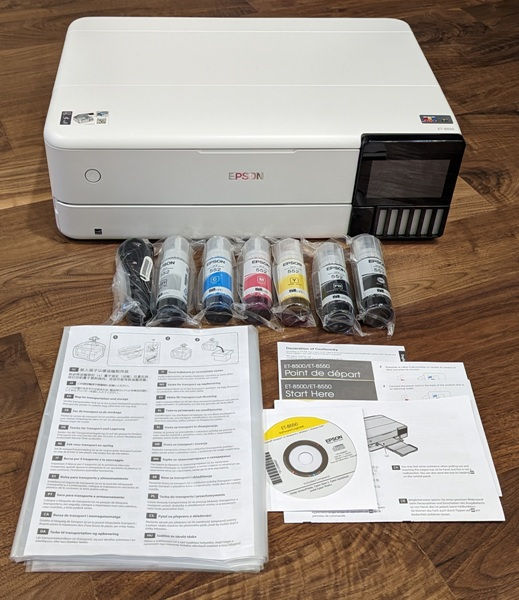
- Epson EcoTank Photograph ET-8550 All-in-One Huge-format Supertank Printer
- Fast Setup Information
- Energy Cable
- CD-ROM (Consumer Information, software program: Epson printer drivers, Epson Scan 2, Epson ScanSmart, Epson Photograph+)
- 1 bottle of 552 Photograph Black (70 mL), 1 bottle of 552 Black (70 mL), and 1 bottle every of 552 Cyan, Magenta, Yellow, and Grey (70 mL)
- Bag to move the printer (in case you want it)
{Hardware} specs
Click on to develop Epson ET-8550 {hardware} specs
- Print
- Printing Know-how: 6-color (BK, PB, C, M, Y, Gy)
- Printer Language(s): ESC/P-R
- Most Print Decision: 5760 x 1440 dpi
- Print Velocity: Black 16.0 ISO ppm / Coloration 12.0 ISO ppm
- 2-sided Print Velocity: Black 6.0 ISO ppm / Coloration 5.0 ISO ppm
- Borderless 4″ x 6″ Photograph Print Velocity 15 seconds (Draft Mode, Premium Shiny Photograph Paper)
- Cellular and Voice-activated Printing
- Epson Join™ Options: E-mail Print, Distant Print, Scan to Cloud
- Purposes: Epson Sensible Panel app, Epson Print Format app (iOS), Epson Artistic Print app
- Different: Apple® AirPrint®, Android printing, Mopria® Print Service
- Voice Activation: Siri®, Epson Join, Amazon™ Alexa
- Copy
- Copy High quality (Variety of Colours)
- 256 gradations/16.7 mil colours
- Most Copies 99 pages
- Copy Decision (Max.) 600 x 600 dpi (enter)
- Most Copy Measurement: Authorized
- Copy Options: Copy Decision (Print) 360 x 360 dpi, 720 x 720 dpi, Automated 1-sided to 2-sided copy, Discount/Enlargement 25 to 400%
- Scan
- Photoelectric Gadget: CIS
- Scanner Kind: Flatbed coloration picture scanner
- Most {Hardware} Decision: 1200 x 4800 dpi
- Scan Measurement, Most (flatbed): 8.5″ x 14″ (216 x 355.6 mm)
- Most Decision: 9600 dpi interpolated
- Scanner Bit Depth (coloration): 48-bit coloration enter / 24-bit coloration output
- Scan Compatibility: TWAIN, WIA, ICA, TWAIN Studying
- Decision: 75~9600 dpi (1 dpi step), TWAIN Output Format: PDF, JPEG, PNG, TIFF, Multi-TIFF, BMP (Home windows), PICT (Mac®), Scan to Laptop Epson ScanSmart, Scan to Reminiscence Gadget
- Commonplace Connectivity
- Hello-Velocity USB
- Wi-fi: Wi-Fi® 512, 802.11 b/g/n/a/ac
- Wired Ethernet: Ethernet (10/100)
- Wi-Fi Direct®: Sure
- Reminiscence Card Slots: SD Card, USB
- Working Techniques: Home windows 10 (32-bit, 64-bit), Home windows 8.1 (32-bit, 64-bit), Home windows 8 (32-bit, 64-bit), Home windows 7 (32-bit, 64-bit), Home windows Vista® (32-bit, 64-bit), Home windows Server 2003 SP213 or later, 2003 R2, 2008, 2008 R2, 2012, 2012 R2, 2016, 2019, Mac OS® X 10.6.8 through 11.x.14
- Paper Dealing with
- Paper Sizes: 13″ x 19″ (A3+), 11″ x 17″, A3, Authorized, Letter, A4, Govt, 8″ x 10″, 5″ x 7″, 4″ x 6″, 3.5″ x 5″, A6, Half Letter, #10 Envelope, Consumer Outlined (2.2″ x 3.4″ to 13″ x 78.7″)
- Max. Paper Measurement: 13″ x 19″ (A3+)
- Max. Paper Weight: Plain: 64-90 g/m², PPPG: 102-300 g/m²
- Max. Paper Thickness: 1.3mm (Rear Straight Move)
- Borderless Printing: 13” x 19”, A3+, 11” x 17”, A3, Authorized, Letter, A4, 8” x 10”, 5” x 7”, 4” x 6”, 3.5” x 5”
- Paper Sorts: Plain Paper, Shiny White Paper, Photograph Paper Shiny, Premium Photograph Paper Shiny, Extremely Premium Photograph Paper Shiny, Premium Semigloss Photograph Paper, Extremely Premium Photograph Paper Luster, Presentation Paper Matte, Premium Presentation Paper Matte, Velvet Fantastic Artwork Paper, Skinny Paper, Card Inventory
- Envelope Sorts: No. 10
- Enter Paper Capability: Entrance Tray 1: 20 sheets photograph 5×7”, Entrance Tray 2: 100 sheets plain Letter/A4, Rear: 50 sheets plain or 5 sheets photograph A3+, Rear Straight Move: 1 sheet
- Output Tray Paper Capability: 50 sheets (plain paper, Letter), 20 sheets (PPPG)
- Direct CD Printing: Sure
- 2-sided (Duplex) Printing: Automated
- Weight and Dimensions
- Printing dimensions: (W x D x H) 20.6″ x 29.8″ x 16.9″ (523 x 758 x 430mm)
- Storage dimensions: (W x D x H) 20.6″ x 14.9″ x 6.7″ (523 x 379 x 169mm)
- Weight: 24.5 LB (11.1kg) printer solely
- Packaging dimensions and weight: (W x D x H): 25.9″ x 18.1″ x 10.3″ (660 x 459 x 263 mm); 31.9 lb (14.5 kg) field
- Normal
- Show: 4.3″ contact LCD
- Temperature Working 50° to 95 °F (10° to 35 °C)
- Temperature Storage -4° to 104 °F (-20° to 40 °C)
- Relative Humidity: Working: 20% – 80% RH, Storage: 5% – 85% RH
- Sound Degree (ISO7779): Sound Stress/PC Printing (Plain Paper default) Coloration: 48 dB(A) or much less
- Rated Voltage: AC 100 to 120 V
- Rated Frequency: 50 to 60 Hz
- Rated Present: 0.7A
- Energy Consumption:
- Standalone Copying: (ISO/IEC 24712 Sample) 17W
- Prepared Mode: 7.5W
- Sleep Mode: 0.8W
- Energy Off Mode: 0.2W
- Typical Electrical energy Consumption (TEC): 0.15kWh
- Security Approvals Security Requirements: UL60950-1, CAN/CSA-C22.2 No.60950-1, FCC Part15 Subpart B Class B, ICES-003 Class B
- Nation of Origin: Indonesia
- Ink
- Alternative Ink Bottles:
- 552 Black pigment ink bottle (70 mL) yield: 6700 pages;
- 552 Photograph Black dye ink bottle (70 mL) yield: 7300 pages;
- 552 Grey dye ink bottle (70mL) yield: 46,600 pages;
- 552 coloration (Cyan, Magenta, Yellow) dye ink bottles (70 mL) yield: 6200 pages
- Epson strongly recommends using real ink to make sure optimum print high quality and efficiency.
- Alternative Ink Bottles:
- Eco Options
- ENERGY STAR® certified
- RoHS Grievance
- Finish-of-life choices obtainable
- Epson America. Inc. is a SmartWay® Transport Companion
Design and options
The Epson EcoTank Photograph ET-8550 All-in-One Huge-format Supertank Printer is bigger than the Epson EcoTank Photograph ET-8500 Wi-fi Coloration All-in-One Supertank Printer that I reviewed final yr. Each printers are almost an identical. They each have the identical design, have refillable ink tanks, use the identical six varieties and colours of ink, have the identical 4.3″ coloration LCD touchscreen management panel, and have the identical print, copy, and scan resolutions. The variations are the ET-8550 is bigger, weighs extra, and prints, scans, and copies bigger photographs and paperwork – which is precisely what I wished.
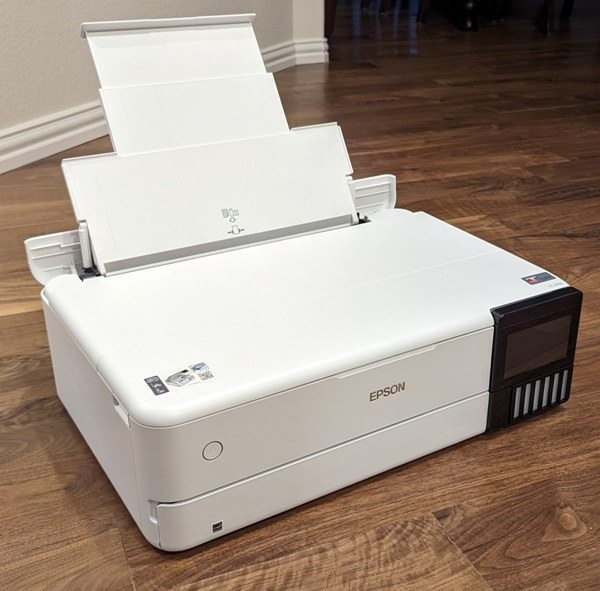
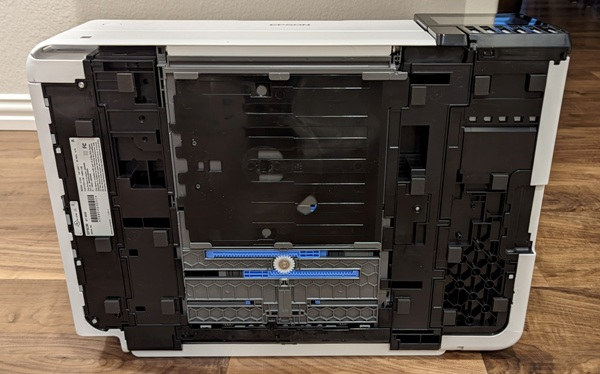
The Epson ET-8550 measures 20.6″W x 14.9″D x 6.7″H (523 x 379 x 169mm) as proven above. Nevertheless, when printing with the output tray and the rear paper tray help prolonged, it measures 20.6″W x 29.8″D x 16.9″H (523 x 758 x 430mm).
The outer shell is white matte plastic. I like its clear look.
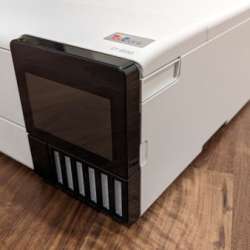
The touchscreen management panel on the entrance of the ET-8550 makes it straightforward to print, copy, or scan proper from the printer. This panel additionally tilts upward for simpler viewing.
There are slots for an SD card and a USB-A drive positioned on the left entrance of the printer when you want to print from storage units.
Paper sizes: The printer can print on varied sizes of paper: 13″ x 19″ (A3+), 11″ x 17″, A3, Authorized, Letter, A4, Govt, 8″ x 10″, 5″ x 7″, 4″ x 6″, 3.5″ x 5″, A6, Half Letter, #10 Envelope, Consumer Outlined (2.2″ x 3.4″ to 13″ x 78.7″ (rear feed slot)).
Most paper dimension, weight, and thickness: The utmost paper dimension is 13″ x 19″. The utmost paper weight is 64-90 g/m² for plain paper and 102-300 g/m² for photograph paper and the utmost paper thickness it could actually print on is 1.3 mm (rear straight go).
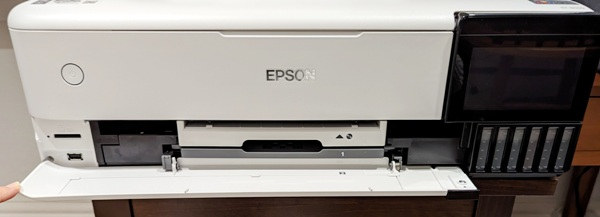
Paper trays: The printer has an output paper tray, two entrance paper trays with edge guides, a rear paper tray with edge guides, a rear straight-pass slot, and a CD/DVD tray.
- Output paper tray (first photograph above): The topmost tray is the output tray. The output tray extends robotically when printing and you’ll both push the tray again in manually or contact the “Output Tray” button on the touchscreen panel of the printer to have the printer retract it for you.
- Paper tray 1 (second photograph above): Paper tray 1 holds as much as 20 sheets of photograph paper. You possibly can print on 3.5″ x 5″, 4″ x 6″, A6 (4.1″ x 5.8″), 5″ x 7″, and 16:9 huge utilizing this tray.
- Paper tray 2 (third photograph above): Paper tray 2 (third photograph above) is able to holding 100 sheets of letter/A4 and 20 sheets of photograph paper. You possibly can print on Letter, A4, Govt (7.25″ x 10.5″), Envelope #10, 8″ x 10″, 5″ x 7″, 4″ x 6″, 3.5″ x 5″, 16:9 huge, A6, Half letter (5.5″ x 8.5″), and user-defined 8.5″ x 11″ utilizing this paper tray.
- The rear paper tray: You possibly can entry the rear paper tray by flipping up the duvet positioned towards the again of the printer. It is advisable to prolong the rear paper help and regulate the sting guides to suit the paper you insert right here. It may deal with 50 sheets of letter/A4 paper and 5 sheets of photograph paper.
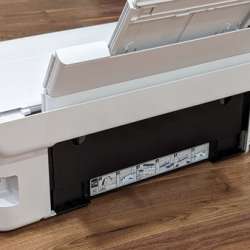

- The rear paper feed slot (or rear straight-pass or guide feed) (proven above): This slot handles longer sheets of paper and thick paper (as much as 1.3 mm thickness) and holds one sheet at a time. To make use of the guide feed, you first have to extract the again of the printer by miserable the spring-loaded tabs. As soon as eliminated, there’s a gentle gray paper information that you simply pop off along with your finger and place simply contained in the opening the place it clicks into place.
- CD/DVD tray: The CD/DVD tray is saved beneath tray 2 and slides out sideways by pulling on the tab. To make use of it, you’ll utterly take away it and insert it above the output tray.

There is no such thing as a Auto Doc Feeder (ADF) on this printer. It has a scanning mattress as an alternative which measures 14.25″ L x 8.75″ W and its most scan dimension is 8.5″ x 14″ (Authorized).
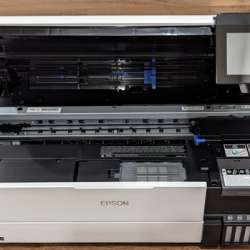
Greedy the indented areas on the perimeters of the printer (proven within the first photograph above) and lifting permits you to entry the interior space of the printer the place the upkeep field and ink tanks are.
The upkeep field is positioned entrance and middle inside the printer (second photograph above). This field collects extra ink and can have to be changed ultimately. A message is meant to pop up on the LCD display screen to let you understand when you need to change it.
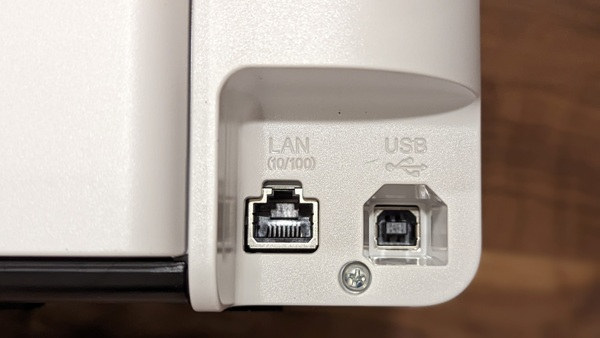
On the again of the printer is an Ethernet port and a USB-B port (proven above). The ability port is positioned on the again as properly on the left facet.
The underside of the printer has a number of rubber pads to stop scratching your furnishings. You may as well see the underside of the CD/DVD tray and the sting information gear for paper tray 2.
Setup
Beginning with the Epson Sensible Panel app and Home windows 11 Drivers and Utilities Combo Package deal Installer
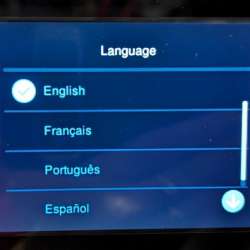
Utilizing the “Begin Right here” information, I powered up the printer and adopted the on-screen prompts on the printer’s LCD touchscreen panel.
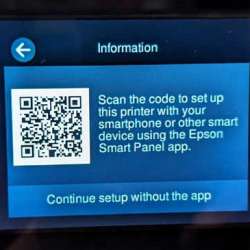
I already put in the Epson Sensible Panel app on my Android cellphone once I reviewed the Epson ET-8500 photograph printer. So I launched the app and tapped on “Set Up a New Product” (first screenshot above). The app looked for my printer and I chosen it from the checklist (second screenshot above). From there, I used to be capable of comply with the app’s prompts to step by the setup course of.
Though I had already put in the Epson software program on my laptop computer once I reviewed the ET-8500, I nonetheless wanted to put in the driving force for the ET-8550. So, I obtain the ET-8550 Drivers and Utilities Combo Package deal Installer (ET8550_Lite_NA.exe file) from Epson’s web site for my Home windows 11 laptop computer to put in the printer driver and software program. This took a couple of minutes as I adopted the prompts. It put in the drivers, Epson Photograph+ software, Epson Photograph+ Device, Epson Printer Connection Checker, Epson ScanSmart software, Epson Software program Updater, and Occasion Supervisor.
Filling Ink Tanks and Ink Initialization Course of
Epson consists of six ink bottles with the printer: one pigment ink which was Black and 5 different dye inks: Photograph Black, Cyan, Yellow, Magenta, and Grey which might be individually vacuum sealed.
Epson has considerably improved its ink tank and bottle designs since I reviewed my first Epson Ecotank printer, the Epson ET-16500 printer. Their ink bottles now have screw-on caps and rubber valves on the ideas to assist forestall ink spills. They designed the bottles (they name them Epson EcoFit Ink bottles) in order that solely the proper ink bottle matches within the appropriate ink tank (the tank has a gap that solely the appropriately keyed ink bottle will slot in).
To entry every ink tank, you first have to flip open the gray lid that covers all of the ink tanks. Every of the six ink tanks has a blue flip-top lid. To fill the Black ink tank, I flipped open its blue lid and inverted the Black ink bottle with out spilling any ink due to the rubber valve on the tip. The keyed tip of the Black ink bottle matches completely within the Black ink tank filling port.
As soon as inserted, the bottle began emptying into the tank robotically and stopped flowing robotically when the tank was full. Don’t squeeze the bottles – it’s not essential to fill the tanks. When completed, I flipped the blue ink tank cap closed and repeated the method with the remainder of the ink colours. There was nonetheless some ink left in every of the bottles once I completed.
Subsequent, I tapped on “Proceed” within the Epson Sensible Panel app to proceed with the ink initialization course of.
Through the ink initialization course of, the app requested if I wished to attach the printer to WiFi, so I used to be capable of full that course of whereas ready for the initialization course of to complete. About 1/5 of the ink within the tanks was used up through the ink initialization course of.
After ink initialization and WiFi setup have been full, I used to be prompted to do a print alignment adjustment on the printer’s LCD touchscreen panel. To do that, the printer prompted me to print a number of take a look at prints. From every take a look at, I wanted to pick probably the most ideal-looking of the print alignments (e.g. choose the quantity related to the traces that have been unbroken, coloured squares that had no white streaks in them and coloured containers that had no overlap or area between them.
Ink Shelf Life: The ink bottles that include the ET-8550 have an expiration date of June and July of 2028 and shouldn’t be used after that date. Be aware: They will solely be saved for one month at 104 °F (40 °C) and can freeze at 3 °F (–16 °C) however can be utilized after roughly 3 hours at 77 °F (25 °C). So it is sensible that for optimum efficiency they need to be saved at room temperature and away from daylight, warmth, and chilly temps.
Moreover, when you go with out printing for a protracted interval, the printer’s ink nozzles can turn into clogged and if that occurs you’ll have issues printing.
Ink Specs: Similar to the Epson ET-8500, the Epson ET-8550 printer makes use of 5 dye-based inks (Photograph Black, Cyan, Yellow, Magenta, and Grey) and one pigment-based ink (Black). Pigment-based inks (strong particles blended in liquid) are extra fade and water resistant versus dye-based inks (water-soluble colours blended in liquid) which aren’t.
Epson Join
Epson Join is a “cloud print and scan service for Epson printers. It permits you to print from any smartphone, pill, or laptop from anyplace on the earth”.
Towards the tip of the set up of the driving force/Epson software program on my laptop computer, I used to be prompted to attach the pET-8550 to Epson Join. As soon as related, you’ll be able to log into Epson Join by an internet browser (you want to arrange an Epson Join account when you don’t already).
Utilizing Epson Join, you’ll be able to arrange an “Accredited senders checklist” thus limiting who can print to your printer remotely. Moreover, you’ll be able to select whether or not or to not print the sender’s info and the physique of the e-mail, arrange an “Entry key” to permit different distant customers to print to the printer so long as they’ve the important thing, and arrange a Cloud Vacation spot Checklist for while you scan issues.
I wished to have the ability to ship scans to sure electronic mail addresses, so I used Epson Hook up with arrange a “Vacation spot checklist”. I added electronic mail addresses and cloud providers like my Google Drive (it additionally permits you to add Field, Dropbox, Evernote, Onedrive, and SharePoint on-line/Groups) to ship my scans to when utilizing the printer’s touchscreen management panel.
Efficiency
Printing on the ET-8550
There are a number of methods to print utilizing the ET-8550. You possibly can print out of your laptop/laptop computer, reminiscence units (thumb drives, SD playing cards), or your cellphone, and even use Google Assistant, Alexa, or Siri to print issues for you. You may as well electronic mail the ET-8550 on to print the e-mail and its file attachments (photographs, paperwork, and so on.).
The ET-8550 additionally prints two-sided pages robotically.
Printing Immediately from the Printer
There are a number of buttons on the touchpad management panel: Copy, Print Photographs, Scan, Varied Prints, Settings, Upkeep, and Smartphone Join.
I’ll cowl Copy, Print Photographs, and Scan later, however what’s “Varied Prints”?
“Varied Prints” control-panel button
By choosing “Varied Prints” on the management panel, there have been a number of choices to select from: “Varied copies”, “Private Stationery”, “Greeting Card”, “Copy to CD/DVD”, and “Coloring Guide”.
1. Varied copies – Copies and restores photographs, copies ID playing cards, makes e-book copies or different borderless copies. When copying an ID card, the printer scans either side earlier than printing.
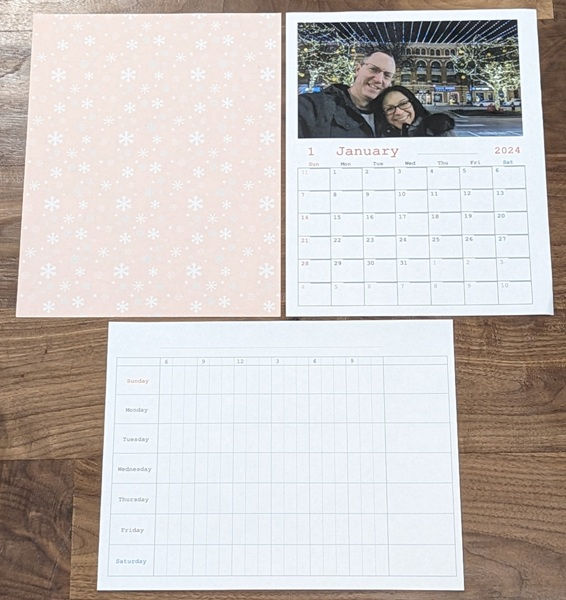
2. Private Stationery – You possibly can print “Design Paper”, “Dominated Paper” (which incorporates grid-style graph paper and music workers paper), “Writing Papers” (which is lined paper), “Schedule”, and “Calendar” sheets.
I attempted the “Design Paper”, “Schedule”, and “Calendar” prints as proven above. They turned out properly.
3. Greeting card – You possibly can create and print a photograph with handwritten notes and drawings.
4. Copy to CD/DVD – This lets you copy a photograph or print a photograph on a CD/DVD label and jewel case index.
5. Coloring boookay – You possibly can print the outlines out of your photographs to make use of as coloring pages.
Printing from my Home windows 11 laptop computer
Printing paperwork on my laptop computer: This was as straightforward as printing to any printer from an software.
The Excel borders printed cleanly, however perhaps not fairly as clear as when printing from my laser printer.
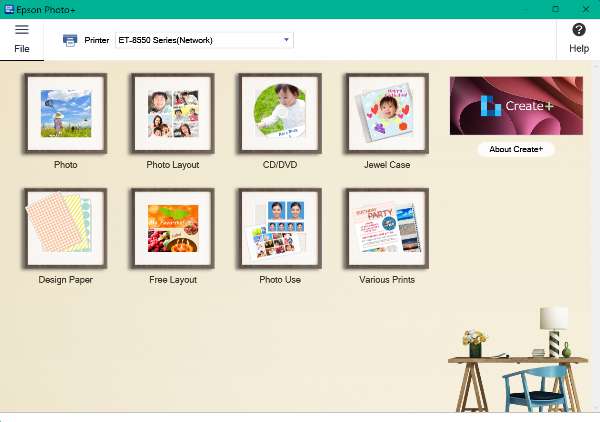
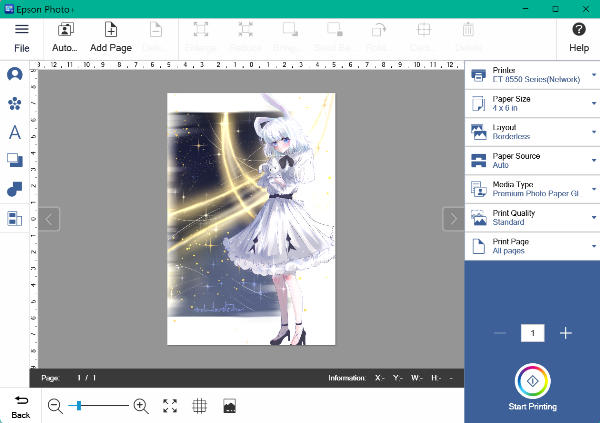
Printing photographs from my laptop computer: To print photographs from my laptop computer, I used the Epson Photograph+ software (Home windows software proven above) and clicked on “Photograph”. I then wanted to decide on a photograph dimension to print after which I chosen the photograph I wished to print from a folder on my laptop computer.
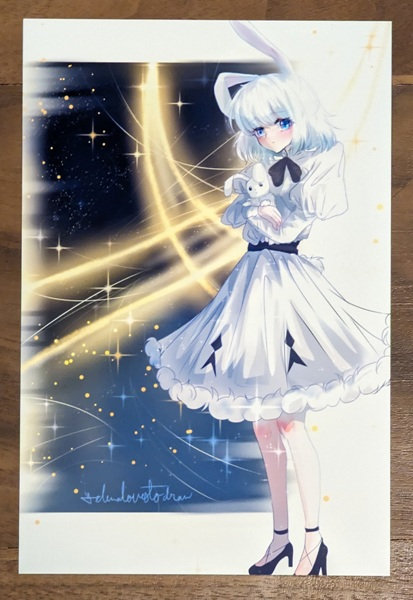
The above is the results of the print. Good! And the colours are correct when in comparison with the unique drawing.
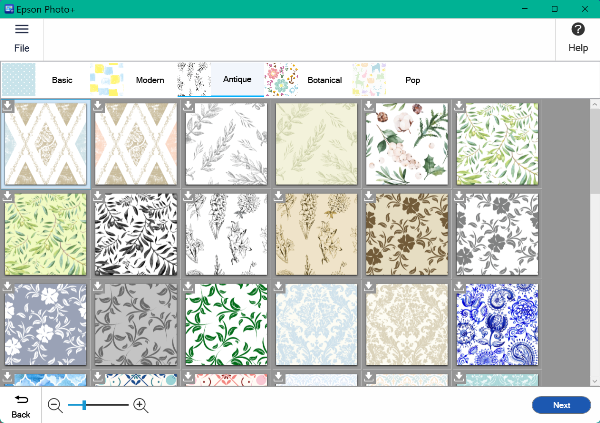
I used “Design Pages” to print a number of design pages, “Photograph Format” to print a collage of some drawings, and “Varied Prints” to print a marriage invitation utilizing the Epson Photograph+ software.
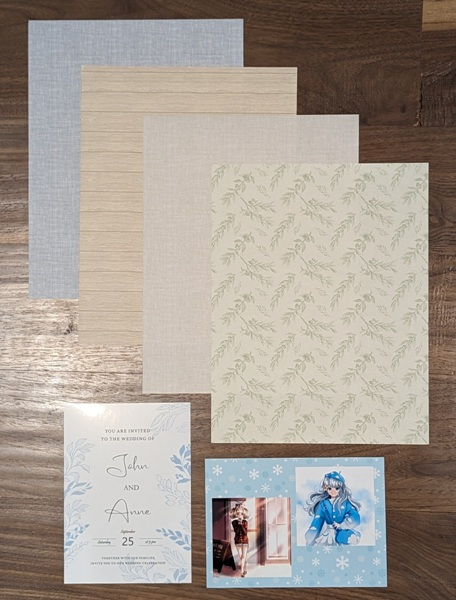
The above are the design pages I printed, a photograph collage, and a marriage invitation. I really like how all of them turned out!
Whilst you can create your individual photograph playing cards utilizing the applying, it’s so rudimentary that you’d have far more success utilizing GIMP or Photoshop.
Epson additionally offers you with a fast print device referred to as Epson Photograph+ Device to print a photograph instantly or print a particular space of a photograph. I haven’t used this since printing from my cellphone is really easy utilizing the Epson Sensible Panel app.
There are such a lot of methods to print to the ET-8550 that I didn’t use this software very a lot. The one merchandise I’ll use is the “Design Pages”. In any other case, I discovered the Epson Photograph+ software to be much less helpful than the Epson Sensible Panel app.
Printing from my cellphone utilizing the Epson Sensible Panel app
I printed most of my photographs utilizing the Epson Sensible Panel app (obtainable for Android and iOS) as a result of all my photographs are on my cellphone.
The app accommodates a number of buttons on the backside of the app dwelling display screen: Print Photographs, Print Paperwork, Doc Seize, Scan, Copy, Preset Copy, Entry to Class (print assignments or scan paperwork from Google Classroom), ID Card, Borderless Copy, Guide Copy, Artistic Print (this can be a separate app that you want to obtain referred to as “Epson Artistic Print”), Enjoyable with Printing, Visitor Connection, Assist, and Print Head Cleansing.
Printing photographs from the Epson Sensible Panel app is really easy:
- Faucet on the “Choose Photographs” button (proven within the first screenshot above)
- Choose the file location of the photograph you wish to print (from areas in your cellphone like your digital camera, screenshots, downloads, photos out of your texting apps, and so on.)
- Choose the photograph to print (middle screenshot above)
- Earlier than printing, you’ll be able to test to be sure that all of the settings are appropriate by tapping on the gear icon positioned within the higher proper nook of the display screen (final screenshot)
- Faucet on “Achieved” positioned within the higher proper nook within the final screenshot above, which takes you again to the photograph (middle screenshot)
- Final, faucet on the “Print” button
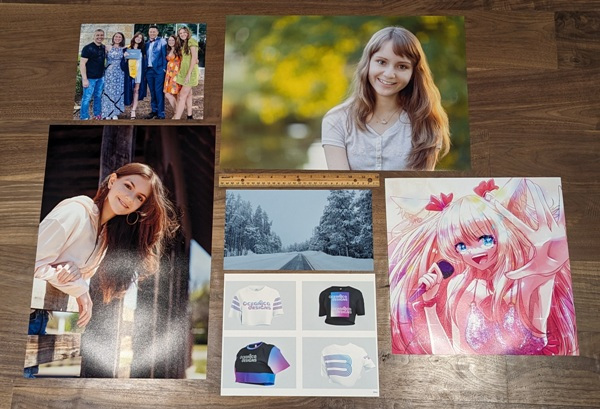
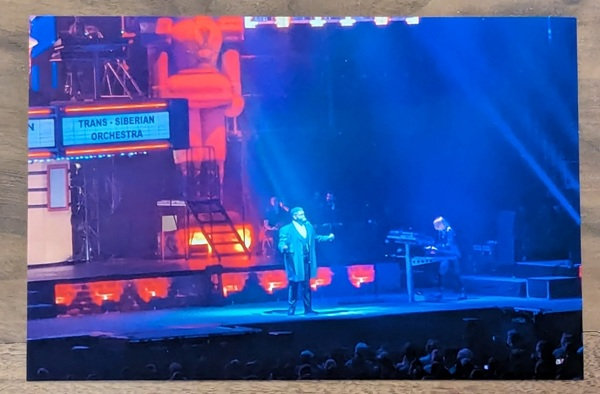
I used to be ecstatic with the prints of my photographs. It was very easy to print them on the ET-8550 with the Sensible Panel app in comparison with my makes an attempt with different non-photo inkjet printers prior to now. I really like the truth that I can print borderless photographs as much as 13″ x 19″ (the 2 largest photographs above are 13″ x 19″). I printed some drawings and design mock-ups too which turned out splendidly.
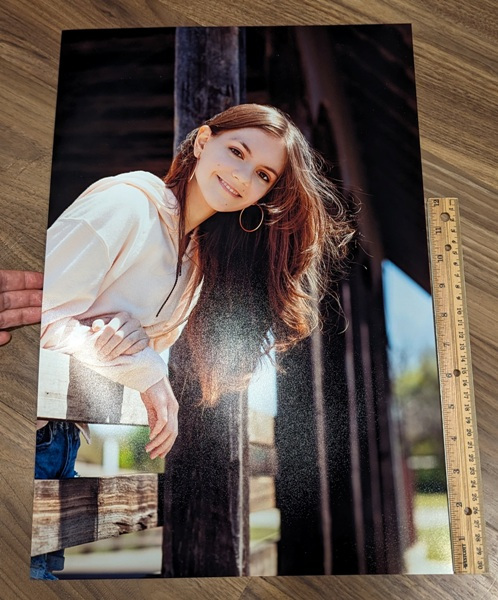


Try the small print!! Granted, the above are photographs of my printed photographs, however the prints turned out amazingly!! The colours of the prints appeared to match that of the unique photographs captured by the photographer (to my untrained eye). Should you’re an expert photographer or graphic artist, you’ll have a unique opinion on these outcomes. I’ve learn that skilled photographers want extra colours to adequately symbolize the full-color gamut. However I LOVE the prints!!
Printing from Reminiscence Gadget
I used to be capable of simply print photographs from a flash drive and didn’t have any points.
E-mail Printing
It is advisable to arrange the ET-8550 printer in Epson Hook up with electronic mail print jobs to the printer. I did so and was capable of electronic mail print jobs of paperwork and photographs to the printer with none issues. It’s necessary to level out that the printouts will use the settings (plain paper and photograph paper dimension) that you choose in Epson Join.
Voice Printing
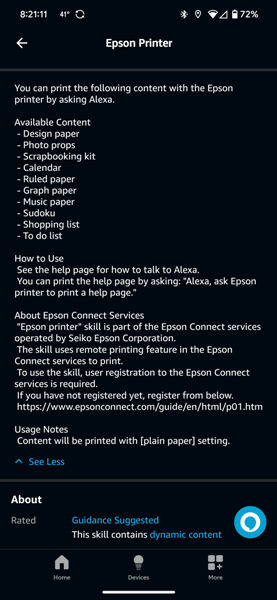
I arrange the “Epson Printer Talent” on my Echo machine. This voice printing talent permits you to print a number of issues like sudoku, design paper, or your buying checklist. I requested Alexa to print my buying checklist and it did (“Alexa, ask Epson printer to print my buying checklist”). Though that is an fascinating function, I don’t see voice printing as being sensible or one thing that I’ll use sooner or later.
Copying on the ET-8550
You possibly can copy and scan paperwork utilizing the scanning mattress. This printer doesn’t have an ADF.
It may make 1-sided to 2-sided copies, however you need to scan either side of the doc manually by flipping the doc over within the scanning mattress. Nevertheless, you don’t have to feed the paper again into the printer to repeat on either side, the printer will do that robotically.
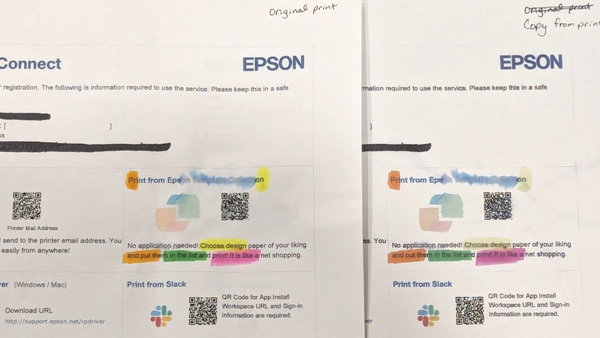
The primary doc proven above is the unique printed doc. The second doc above is the copy. The unique model of the doc was the one I used to check how the ink handles drops of water and highlighters. The colour inks actually bleed however the black bleeds so much much less.
Scanning on the ET-8550
When scanning paperwork, you need to use the Epson ET-8550 scanning mattress. You possibly can scan straight from the printer, out of your laptop or laptop computer utilizing the Epson Scan Sensible software program, or out of your cell machine utilizing the Epson Sensible Panel app.
The ET-8550 doesn’t do computerized duplex scanning. Thus, once I want either side scanned concurrently, I favor to make use of my scanner which has an ADF and is ready as much as do auto-duplexing.
Scanning straight from the printer
Tapping on the Scan button on the printer’s touchscreen management panel you’ll be able to scan a doc to a reminiscence machine, laptop, cloud service, or Net Companies for Units (WSD). To scan to “Cloud”, you have to first arrange a vacation spot checklist utilizing Epson Join which I did. I cherished with the ability to choose a location to avoid wasting the scanned doc. After scanning one thing whereas standing on the printer I might choose an electronic mail or cloud vacation spot and have the doc on my cellphone straight away.
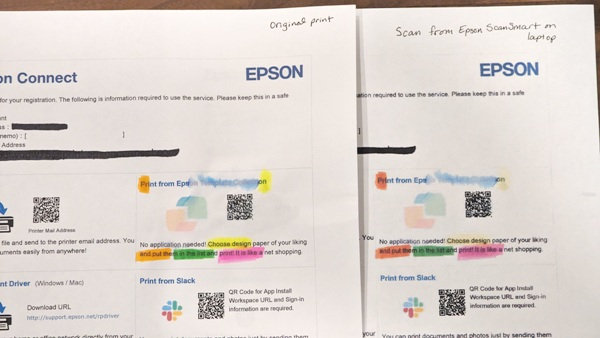
The above is a comparability of the unique print with highlighting marks and the printout of the scan. You possibly can see the scanned picture has much less vibrant colours.
Scanning utilizing a pc/laptop computer
The above screenshots illustrate scanning utilizing the Scan Sensible software program on a pc or laptop computer. You possibly can print the picture or save the scan to one in all your cloud storage areas, put it aside as an attachment to an electronic mail (electronic mail providers like Outlook, not net electronic mail), or put it aside as a file in your laptop. That is easy to make use of and labored properly.
Scanning on my cellphone utilizing the Epson Sensible Panel app
Scanning paperwork utilizing the Epson Sensible Panel app can be straightforward. I positioned my doc on the scanning mattress, tapped on the “Scan” button within the app (first screenshot above), checked the settings, and tapped on the “Begin” button (second screenshot). I then checked the preview (third screenshot) to see if I wanted to crop or edit the scan after which chosen a location to avoid wasting to and tapped on the “Save” button (final screenshot).
You may as well use the “Doc Seize” button on the Sensible Panel app to take a photograph of the doc and print it or put it aside as a PDF.
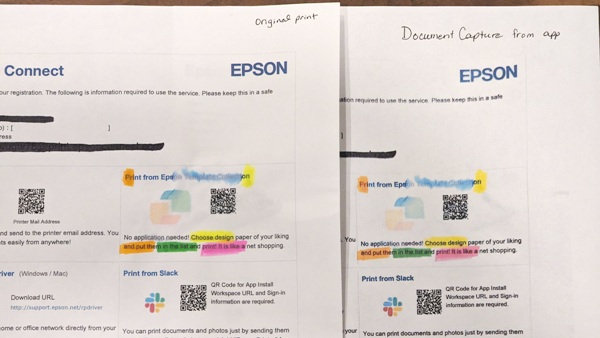
Doc Seize higher captures the colours of the highlighters than scanning does.
The Epson ET-8550 Huge-format printer can achieve this many issues. Click on right here to view the Consumer Information.
What I like
- Setup was straightforward
- It prints incredible borderless photographs as much as 13″ x 19″
- Printing, scanning, and copying paperwork from the printer, laptop, or cellphone are straightforward
- The Epson Sensible Panel app is superior
- Filling the ink tanks is really easy
- Has auto 2-sided printing
- Having refillable ink tanks is superior
What I’d change
- It’s costly
- The textual content shouldn’t be fairly as clear and exact as a laser printer
- The ink bleeds when moist (coloured ink particularly; black is extra everlasting)
Closing ideas
The Epson EcoTank Photograph ET-8550 All-in-One Huge-format Supertank Printer is a superb photograph printer for newbie photographers like me. It has a variety of performance. You possibly can print, copy, or scan from the printer, your laptop, or your cellphone. The Epson Sensible Panel app is tremendous straightforward to make use of to print, copy, and scan. It does computerized two-sided doc printing and I really like that it prints stunning, detailed, borderless photographs as much as 13″ x 19″. As well as, EcoTank printers additionally prevent cash on ink as a result of they use refill bottles of ink and also you don’t must refill them very steadily.
There are a few downsides. The printer is pricey. Moreover, most printed paperwork (not photographs) look first rate however the textual content shouldn’t be as clear and exact as that of a laser printer. Additionally, when water will get on a printed coloration doc (or while you use highlighters), the ink bleeds and smears (largely simply the coloured inks).
I really like, love, love the photograph prints from this printer. It might not have the variety of ink colours required to provide skilled prints, however I can’t inform so I’m tremendous blissful. Should you can afford the printer and like printing larger-sized photographs, I extremely advocate this printer.
Value: $599.99 at Amazon, Epson, B&H Photograph, Adorama, Workplace Depot, Staples
The place to purchase: Amazon, Epson, B&H Photograph, Adorama, Workplace Depot, Staples
Supply: The pattern of this product was supplied by Epson.